Showing product images on the WooCommerce checkout page gives customers a quick visual confirmation of what they are ordering before payment. That extra product visibility can make checkout feel clearer, reduce hesitation, and support a more confident buying decision.
In this guide, we’ll guide you through how to show product images in WooCommerce checkout page, along with the key layout and usability. Keep reading to see which method fits your store best and how to add product images without disrupting the checkout experience.
Quick Tips Before Adding Product Images to WooCommerce Checkout
Adding product images to the WooCommerce checkout page works best when the images support order confirmation without making the page feel heavier or more distracting. Here’s the quick tips before going to the details of each.
- Use Clear Product Thumbnails
- Keep Image Size Small
- Place Images Near Order Details
- Avoid Crowding The Checkout
- Check Mobile Layout First
- Use Consistent Product Images
- Watch Page Speed Impact
- Test The Full Checkout Flow
What Difference Does Showing Product Images on the Checkout Page Make?
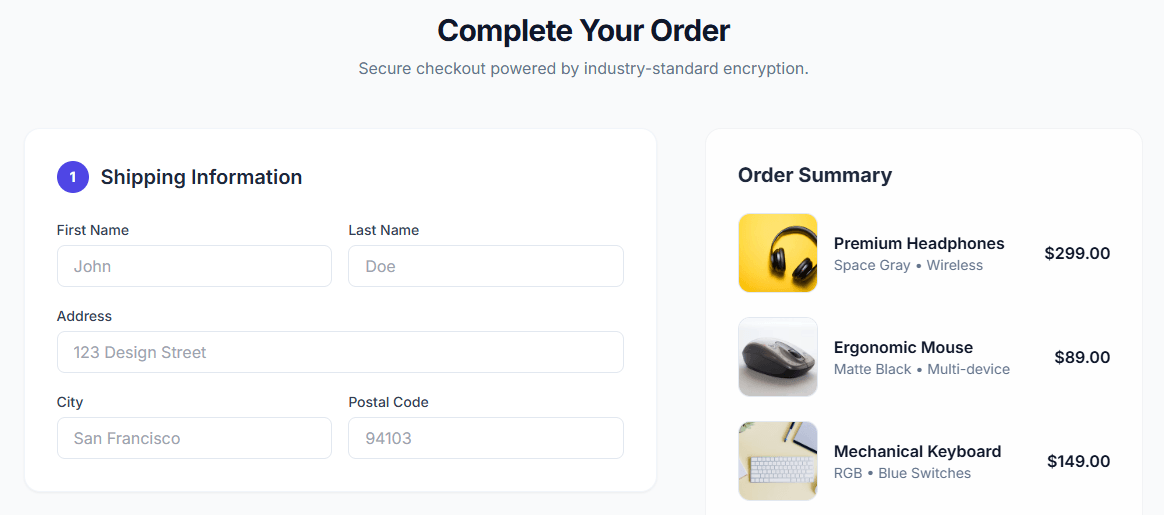
Showing product images on the checkout page can make the order feel clearer, more recognizable, and easier to review before payment. This small visual element often helps customers confirm what they are buying and can improve confidence without changing the full checkout flow.
- Improves Product Recognition: Customers can quickly confirm the item they are about to purchase.
- Reduces Purchase Confusion: Product images help lower the chance of second-guessing during checkout.
- Supports Visual Confirmation: Shoppers can match the checkout item with what they selected earlier.
- Makes Checkout Feel More Trustworthy: A visible product image can make the order summary feel more complete.
- Helps With Variant Identification: Images can make it easier to recognize product choices tied to appearance.
- Strengthens One-Page Checkout Clarity: The checkout feels easier to follow when the product stays visible.
- Can Support Conversion Confidence: Clear product visibility may help some shoppers complete the order more comfortably.
What to Get Right Before Showing Product Images at Checkout?
Product images can improve checkout clarity, but they work best when the layout stays clean, the images load properly, and the product details remain easy to review. This matters even more when you are using One Page Checkout for WooCommerce, where product visibility should support the checkout flow without making the page feel heavier or more distracting.
- Use Clear Thumbnail Images: Choose product images that stay sharp, recognizable, and easy to review inside the checkout area.
- Keep Image Size Balanced: Use images that support the order summary without taking too much space from key checkout content.
- Match Images To Product Variants: Make sure the displayed image reflects the selected variation when the product changes by color, style, or type.
- Protect Checkout Readability: Keep product titles, prices, and other order details easy to read beside the image.
- Maintain Mobile-Friendly Layout: Check that the image does not crowd fields, buttons, or order details on smaller screens.
- Watch Image Loading Speed: Use optimized images so checkout stays fast and responsive while product thumbnails load properly.
- Avoid Visual Clutter: Add product images in a way that supports order confirmation without making the checkout look crowded.
- Test The Full Checkout View: Review the page on desktop and mobile to confirm the image improves clarity without affecting usability.
How to Show Product Images in WooCommerce Checkout Page?
Showing product images at checkout helps buyers quickly confirm their order, reduces confusion with similar items, and improves confidence before payment. Here’s how you can do this using code or a plugin.
Method 1: Add Product Images With a Hook-Based Snippet
This method adds a small product image beside the product name inside the checkout order review. It uses WooCommerce hooks during checkout item output, so it stays lightweight and does not affect pricing, totals, or payment processing.
Step-by-Step Setup
- Create a child theme or install a code snippets plugin so theme updates do not remove your changes.
- Add a snippet that runs only on the checkout page to avoid changing the cart layout.
- Retrieve the product image or the variation image when available.
- Insert the image HTML before the product name in the checkout order review output.
- Test the checkout flow, including shipping changes, coupon use, and AJAX refreshes.
A common approach is to filter the cart item name output and prepend the product or variation image using WooCommerce’s built-in image function. This method is widely used because it is stable, lightweight, and predictable.
Important Technical Notes
- Add checkout-only conditions so the cart page remains unchanged.
- Use small thumbnail sizes to keep checkout loading fast.
- Show a placeholder image when a product has no featured image, so the layout stays aligned.
Best For: Stores with development resources that want a lightweight and update-safe solution without installing extra plugins.
Method 2 (Recommended): One Page Quick Checkout for WooCommerce
This no-code method lets you show product images directly on the checkout page using built-in settings. It is clean, fast to configure, and avoids editing theme files or writing snippets. It also fits well when you already rely on a dedicated WooCommerce checkout plugin to manage checkout behavior.
Step-by-step setup
Step 1: Install the Plugin
Free version:
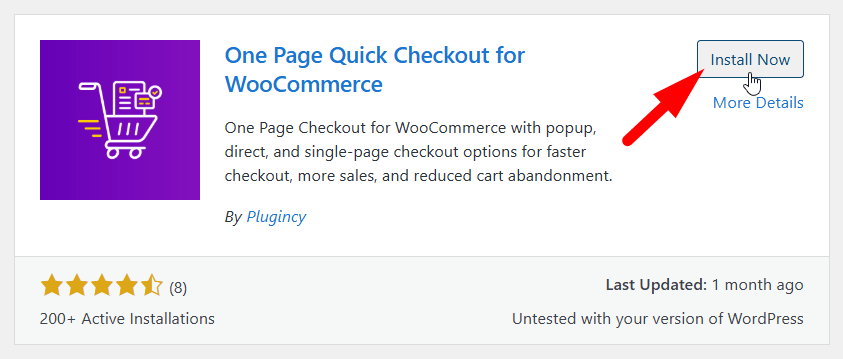
- Go to WordPress Dashboard, open Plugins, then Add New.
- Search for “One Page Quick Checkout for WooCommerce”.
- Click Install Now and then Activate.
PRO version:
- Purchase the PRO plugin from the official website.
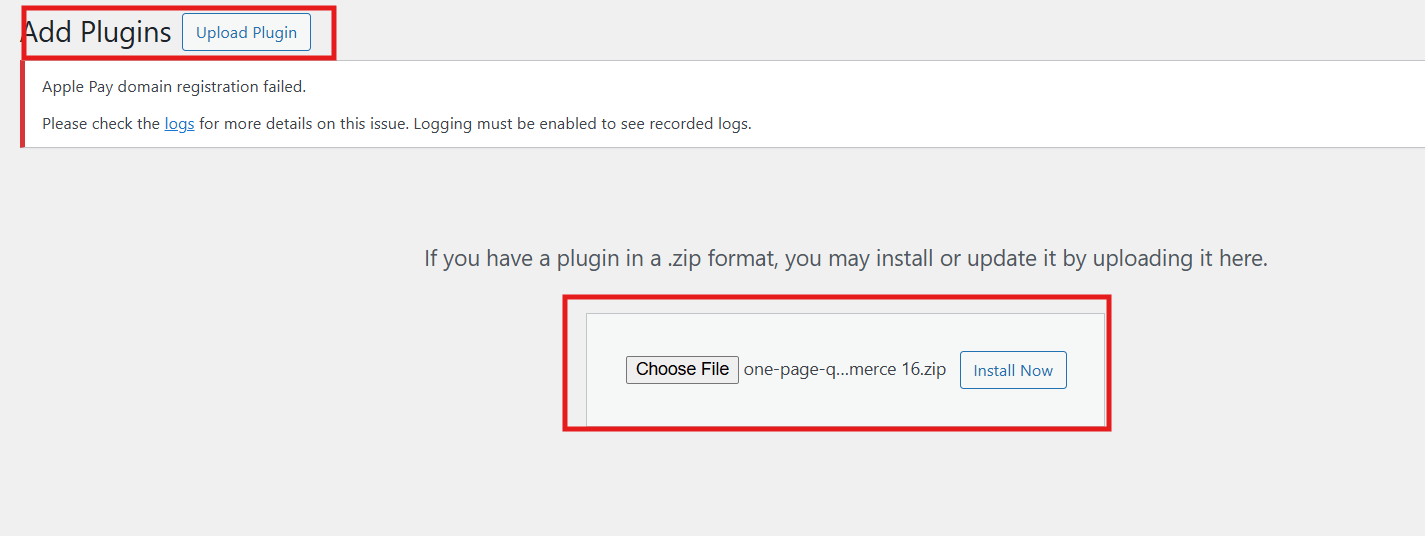
- Download the ZIP file from the email you received.
- Go to Plugins, click Add New, then Upload Plugin.
- Upload the ZIP file, click Install Now, and Activate.
- Enter the license key under the One Page Quick Checkout settings.
Step 2: Enable Product Images on Checkout
- Go to Dashboard and open Onpage Checkout.
- Click on Features.
- Enable the “Add Image Before Product” option.
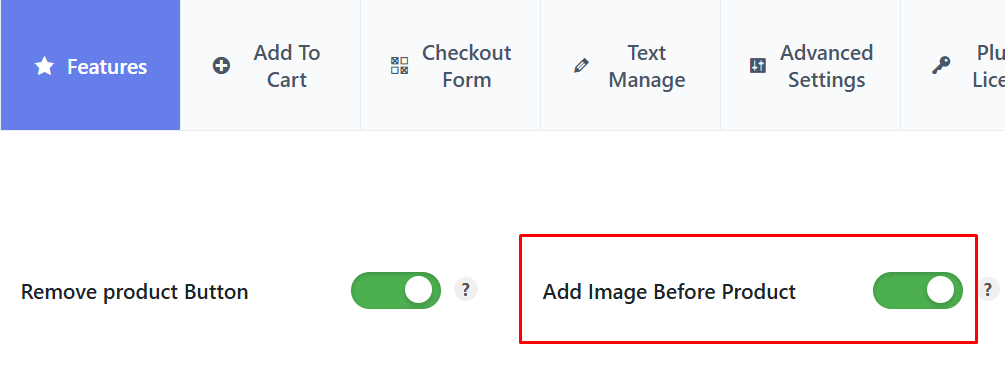
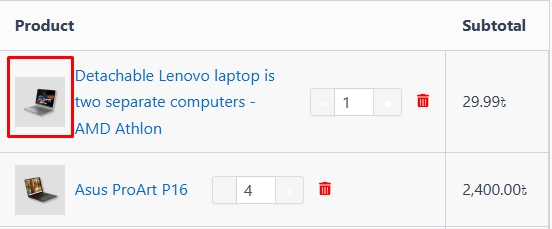
Once enabled, product images appear next to product names in the checkout order review, giving shoppers clear visual confirmation before payment.
Best For: Store owners who want the fastest and safest setup, prefer no-code solutions, and want checkout images to work smoothly with modern checkout layouts.
Method 3: Use a Template Override for Full Layout Control
If you need more control over placement, spacing, columns, or thumbnail size, overriding the checkout order review template gives you deeper control over the checkout markup and layout.
Step-by-Step Setup
- Copy review-order.php from the WooCommerce templates folder.
- Paste it into your-child-theme/woocommerce/checkout/.
- Find the section where checkout line items are rendered.
- Add the product image HTML beside the product name where needed.
- Keep template edits minimal so future WooCommerce updates are easier to review.
- Retest the checkout after every WooCommerce update.
Best For: Custom themes or highly tailored checkout designs where layout control matters more than setup speed.
Styling the Checkout Images (size, spacing, mobile)
Proper styling ensures product images blend naturally into the checkout layout instead of feeling forced or misaligned. Since checkout is a sensitive step, clean visuals help shoppers scan items quickly without distraction or layout shifts.
Step-by-step Styling Checklist
- Keep thumbnail width small, ideally between 32px and 60px, so images stay visible without pushing text or totals out of place.
- Maintain consistent spacing between the image and product name to keep each row clean and easy to scan.
- Align images vertically with the product title line to avoid uneven rows and visual clutter.
- Test on mobile screens to ensure images scale properly and never overflow or wrap awkwardly.
When checkout images are styled cleanly and consistently, they feel like a natural part of the checkout flow, helping shoppers review items comfortably without distraction or layout issues.
Classic checkout vs Block checkout compatibility
WooCommerce now offers two different checkout systems, and choosing the right method to show product images depends entirely on which one your store uses. Each system handles rendering, hooks, and layout control differently, which directly affects image display behavior.
Quick comparison chart
| Aspect | Classic Checkout | Block Checkout |
| Rendering system | PHP templates and hooks | React-based checkout blocks |
| Hook support | Fully supported | Limited support |
| Template overrides | Supported | Not supported |
| Plugin compatibility | Wide compatibility | Requires block-ready plugins |
| Best image method | Hook or template-based | Plugin based |
Checkout type identification
Open your checkout page in the WordPress editor and check whether it uses classic shortcodes or Checkout blocks. This step is critical because it determines whether PHP hooks, templates, or plugin settings will apply correctly.
Image display behavior
In Classic checkout, hooks and template overrides work reliably because WooCommerce renders line items through PHP. In Block checkout, many traditional hooks do not run, which can prevent images from rendering unless the method is block-compatible.
Method selection guidance
If your store uses Block checkout, plugin-based solutions are usually the safest option. For Classic checkout, hook-based snippets or template overrides provide more control and flexibility for placing product images.
Always confirm your checkout system first, as using the wrong method can cause images to fail, layouts to break, or updates to overwrite your changes.
Performance and UX impact
Checkout speed and clarity directly affect purchase decisions. Poor image handling can slow checkout and create doubt at the final step. Optimize visuals carefully to keep buyers confident and ready to complete payment. Continue below to understand how to balance speed and trust.
Thumbnail Size and Load Control
Checkout pages refresh dynamically when shipping, coupons, or totals change. Large or unoptimized images increase load time and cause visual jumps during these updates. Always use small thumbnail sizes and avoid loading full images so checkout remains smooth and responsive.
Avoid Heavy Lazy Loading Behavior
Many lazy-loading scripts are designed for product pages, not checkout. During order review updates, these scripts can fail or reload repeatedly. This creates flicker or missing images, which interrupts the checkout flow and adds unnecessary friction before payment.
Visual Confirmation and Buyer Confidence
Showing product images gives shoppers instant confirmation that they selected the correct item, color, or variation. This visual check plays a key role in building trust on the WooCommerce checkout page, especially when products look similar or include multiple options.
Consistency Across Devices
Checkout must feel stable on both desktop and mobile. Images that shift layout or overflow on small screens distract users and slow decisions. Consistent image sizing and alignment across devices keeps checkout focused and reduces hesitation.
Well-optimized checkout images support speed and confidence, helping shoppers verify orders quickly while keeping the checkout experience smooth and distraction-free.
Troubleshooting (When images do not show)
If product images fail to appear at checkout, the issue is usually technical rather than configuration-related. Checkout relies on dynamic rendering, so small conflicts can prevent images from loading even when the setup looks correct.
Step 1: Clear Cache and Retest
Clear both page cache and object cache, then open checkout in a private browser window. Cached checkout fragments often prevent updated markup from loading, especially when images are added through hooks or plugins.
Step 2: Verify Checkout-Only Logic
Confirm your snippet or plugin targets the checkout page only and hooks into the correct output area. If the logic runs globally or attaches too early, WooCommerce may overwrite the image output during checkout refresh.
Step 3: Check Theme Checkout Overrides
Some themes replace the default order review markup or use custom checkout templates. Review your theme files to see if checkout output is overridden, as this can block image rendering or ignore standard hooks.
Step 4: Confirm Checkout Type Compatibility
If your store uses Block checkout, classic hooks may not fire at all. In this case, test a plugin-based or block-compatible method instead of relying on traditional PHP snippets.
Step 5: Validate Product Images and Fallbacks
Ensure all products have featured images assigned. For products without images, add a placeholder fallback so the layout remains consistent and rows do not collapse or misalign.
Checkout image issues usually come from caching, theme overrides, or checkout type mismatches, so confirming these areas first saves time and avoids unnecessary changes.
Small Upgrades That Pair Well With Checkout Images
Checkout images work best when supported by small confirmation cues earlier in the buying flow. These upgrades reassure shoppers at key moments and reduce second-guessing before payment. Review these options before moving to the next optimization.
- Clear add to cart confirmation messages reassure buyers immediately after an item is added, helping them feel confident that the correct product entered the cart without needing extra page checks.
- When setting up add to cart notifications in WooCommerce, pairing alerts with checkout thumbnails creates a two-step confirmation flow that reduces doubt and lowers hesitation at the final payment stage.
- Visual consistency between cart notifications and checkout images helps shoppers mentally track their choices, especially for similar products or variations, making the entire purchase journey feel predictable and controlled.
Small confirmation cues placed at key steps reduce buyer anxiety and support faster checkout decisions without adding friction or clutter.
Frequently Asked Questions
Before wrapping up, here are a few common questions store owners usually ask after setting up checkout images. These answers focus on practical concerns that often come up during real store use.
Will Checkout Images Affect Order Emails Or Invoices?
No, checkout images only appear during the checkout view. Order emails, invoices, and admin order pages remain unchanged. This keeps customer communication clean while improving visual clarity only where it matters most.
Can Checkout Images Be Shown For Subscription Products?
Yes, checkout images work with subscription products as long as they have featured images. The image is displayed once during checkout review. Subscription renewals are not affected by this visual change.
Do Checkout Images Work With Multi Currency Plugins?
In most cases, yes. Since images are visual elements, they do not interfere with the currency switching logic. Always test checkout after enabling images to confirm totals and currency symbols remain correct.
Is It Safe To Use Checkout Images On High Traffic Stores?
Yes, if images are properly sized and optimized. Using small thumbnails prevents slowdowns. Avoid loading full images to keep checkout fast during traffic spikes.
Can Checkout Images Be Hidden On Specific Devices?
Yes, simple CSS rules can hide images on mobile or tablets if needed. This helps maintain a clean layout for smaller screens without removing images completely.
Concluding Words
Adding images at checkout improves clarity and confidence right before payment. When shoppers can visually confirm items, hesitation drops, and checkout feels smoother. This small change often leads to better completion rates.
If you follow the steps carefully, learning how to show product images in WooCommerce checkout page becomes a simple upgrade that feels natural to buyers and easy to maintain for store owners.