Enabling one page checkout for all products in WooCommerce lets shoppers move from product selection to payment in a single flow across your store. Instead of applying checkout changes product by product, you use a global setup that creates a more consistent buying experience for the full catalog.
This guide explains how to enable one page checkout for all products in WooCommerce step by step. You will learn what to review before applying it storewide, how the setup affects product pages and checkout behavior, and what to test before making the new flow live.
Quick Steps to Enable One Page Checkout for All Products in WooCommerce
Turning on one page checkout across all WooCommerce products involves a few key configuration steps before launch. The process is mostly about applying the checkout flow correctly, reviewing how products behave, and testing the full order experience.
- Choose a plugin that supports one page checkout for all products
- Install and activate the plugin
- Open the global one page checkout settings
- Enable one page checkout across the full product catalog
- Review product page, cart, and button behavior
- Adjust checkout fields and layout where needed
- Test payment, shipping, and tax behavior
- Place full test orders before making it live
How Storewide One Page Checkout Changes the Default Buying Flow
Storewide one page checkout changes the default WooCommerce buying flow by applying the same checkout path across the full catalog. Instead of moving shoppers through separate cart and checkout steps product by product, the store uses a more direct and consistent order process.
- Product pages can lead more directly to checkout
- Cart steps may become less central in the buying flow
- The same checkout style can appear across all products
- Buyers may complete orders with fewer page changes
- Product-to-payment flow can feel faster and more uniform
- Storewide checkout behavior becomes easier to manage consistently
Storewide Readiness Checks Before Global Checkout Changes
Global checkout changes can affect product pages, payment flow, shipping behavior, and mobile usability at the same time. Before rolling out one page checkout for WooCommerce across your full catalog, review these areas to avoid errors, inconsistency, or extra friction in the buying experience.
Review these areas before enabling one page checkout across all products.
- Product Flow Consistency: Review whether most products follow a similar path from selection to payment without needing very different checkout behavior.
- Shipping And Tax Logic: Make sure shipping methods, taxes, and location-based rules still update correctly across the full catalog.
- Payment Gateway Stability: Check that your active payment methods work reliably with dynamic checkout updates and product-wide checkout changes.
- Product Page Compatibility: Confirm that product pages can support the new checkout flow without breaking layout, buttons, or important product details.
- Checkout Field Relevance: Remove or simplify fields that are not necessary, especially if they create extra effort on every product page.
- Mobile Catalog Readiness: Test how the new checkout flow looks and behaves across product pages on smaller screens before rolling it out storewide.
- Validation Product Set: Keep a small group of products ready for testing so you can confirm behavior before applying the change everywhere.
How to Enable One Page Checkout for All Products in WooCommerce?
Enabling one page checkout can feel confusing at first. But once you follow clear steps, it gets easy. Follow these steps to enable one page checkout for all products in WooCommerce.
Method 1: WooCommerce One Page Checkout Plugin
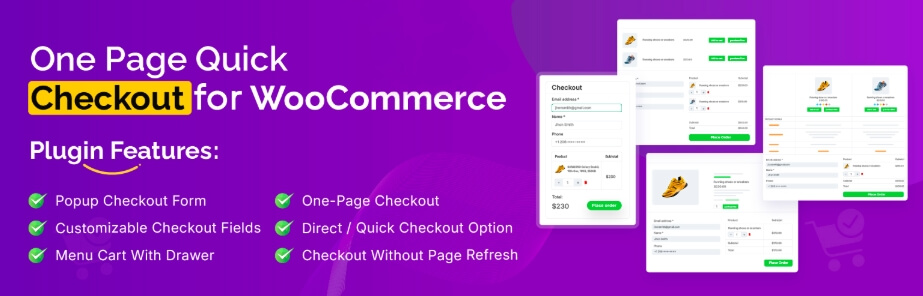
This method is the most complete and reliable choice. It is also easy for beginners to follow. For this guide, use One Page Quick Checkout for WooCommerce, which is a practical WooCommerce checkout plugin with free and paid options available. It lets you start simple and upgrade later if needed.
Step 1: Installation Plugin
Free Version
The free version is a good starting point today. It gives basic tools for digital items. You can install it from your WordPress dashboard. The whole process takes only a few clicks.
- Go to WordPress Admin Dashboard, then open Plugins.
- Click Add New Plugin from the top menu.
- Search “One Page Quick Checkout for WooCommerce” in search.
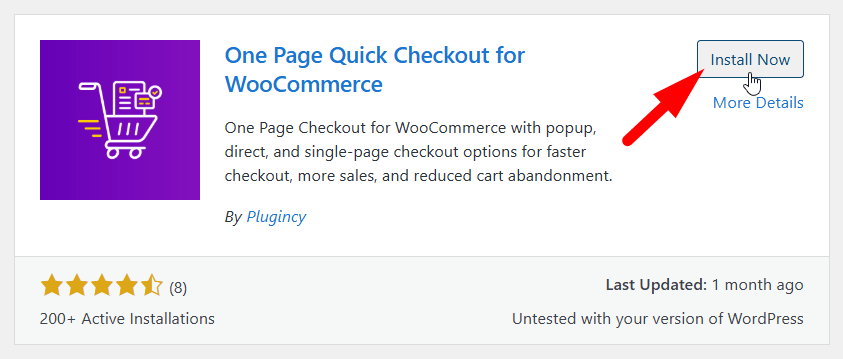
- Click Install Now, then click Activate to finish.
PRO Version
The PRO version gives you more control and features. You buy it from the official website directly. After buying, you get files by email. The setup steps are still easy to follow.
- Visit the official website and purchase the PRO version.
- Check your email and download the plugin ZIP file.
- Log in to WordPress, go to Plugins, then click Add New.
- Click Upload Plugin and select the ZIP file.
- Click Install Now and wait until installation completes.
- Activate the plugin after the installation finishes properly.
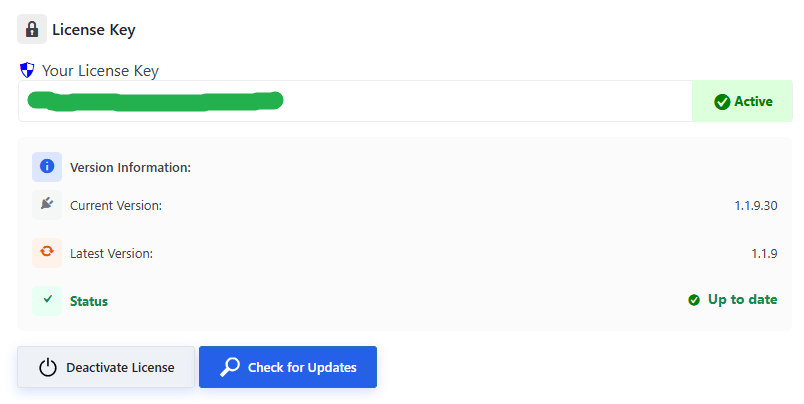
- Open Onpage Checkout > Plugin License, then add the key.
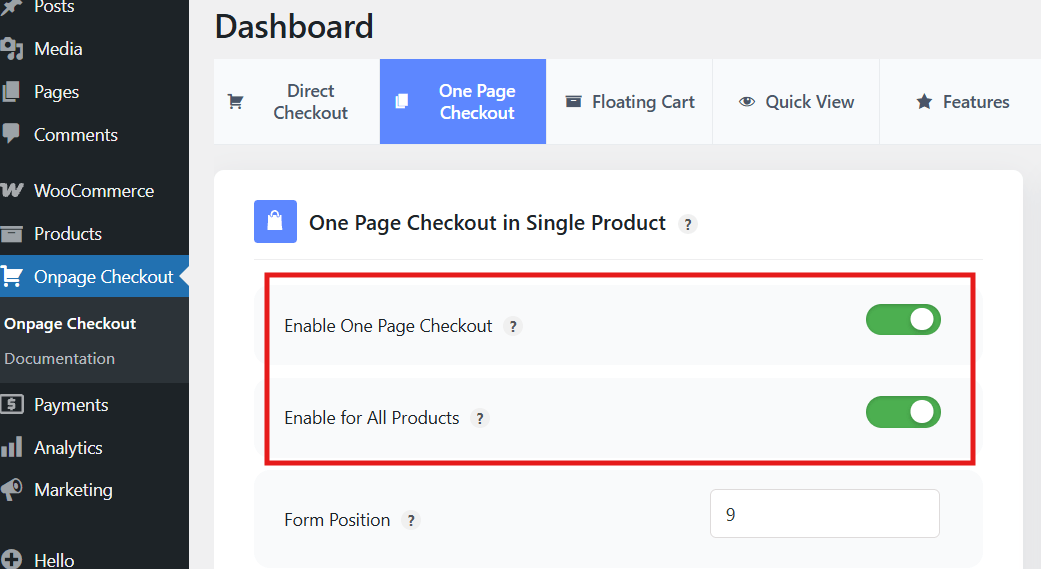
Step 2: Enable One Page Checkout For All Products
After installation, you will see new settings inside the dashboard. These settings control the one page checkout behavior. You only need to enable two options here. Then you save changes and finish the setup.
- From your dashboard, find the setting named Onpage Checkout.
- Click it, then open the One Page Checkout tab.
- Find Enable One Page Checkout and enable it now.
- Find Enable for All Products and enable it too.
- Click Save Changes, and you are done now.
Extra Features
These features help the plugin work smoothly in stores. They help keep checkout clean and easy. They also support common store needs like discounts. This makes the plugin a solid option right now.
- Works with simple and variable products smoothly.
- Supports coupons and payment gateways for easy payments.
- Clean and professional checkout layout for better flow.
Best For
This method fits stores that want a quick setup. It works well for focused selling pages too. Many store owners prefer this for simple product flows. It is also helpful for digital product checkout.
- Stores with single products and direct selling.
- Landing page style selling with simple checkout.
- Digital products need fast checkout steps.
Alternative Method 2: Skip Cart and Go Straight to Checkout
This method uses a built-in WooCommerce setting. It speeds up checkout by skipping the cart page. It is simple to enable and easy to test. Just remember, it still uses separate pages.
Step 1: Go to WooCommerce
These settings are inside the WooCommerce settings panels. You will switch on a redirect option first. Then you may hide the cart page if needed. Follow the steps in the same order.
- Go to WooCommerce → Settings from your dashboard.
- Open Products and find the Add to cart option.
- Enable Redirect to the cart page after successful addition.
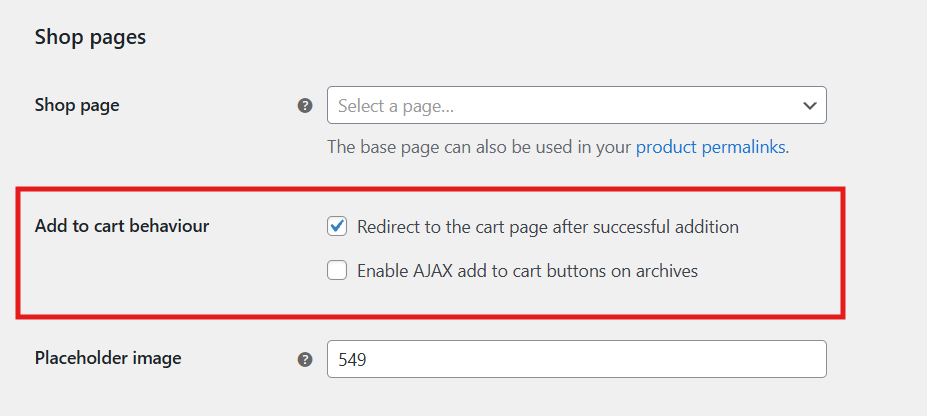
- Go to Advanced and check the cart page settings.
- Remove or hide the cart page if needed.
Step 2: Check
Once enabled, the buying flow changes right away. Customers will click add to cart as usual. Then checkout opens immediately after that click. The cart page will be skipped automatically.
- Customer clicks Add to cart on the product page.
- Checkout page opens instantly after the click.
- Cart page is skipped during the checkout flow.
Important Note
This is important to understand before choosing this method. It is not a true one-page checkout layout. The product and checkout are still separate pages. But it still makes buying feel faster.
- Product page and checkout page are still different pages.
Best For
This method works well for quick buying at stores. It fits stores with fewer products and steps. It also helps when you want a faster checkout flow. It is simple and useful for basic setups.
- Fast checkout flow with fewer clicks.
- Stores with few products and simple choices.
- Quick buying process for basic store needs.
Alternative Method 3: Custom One Page Checkout Using Shortcodes
This method gives you full control over layout. It needs basic technical knowledge to manage safely. You will build a custom page using shortcodes. Then you test it to avoid theme conflicts.
Steps:
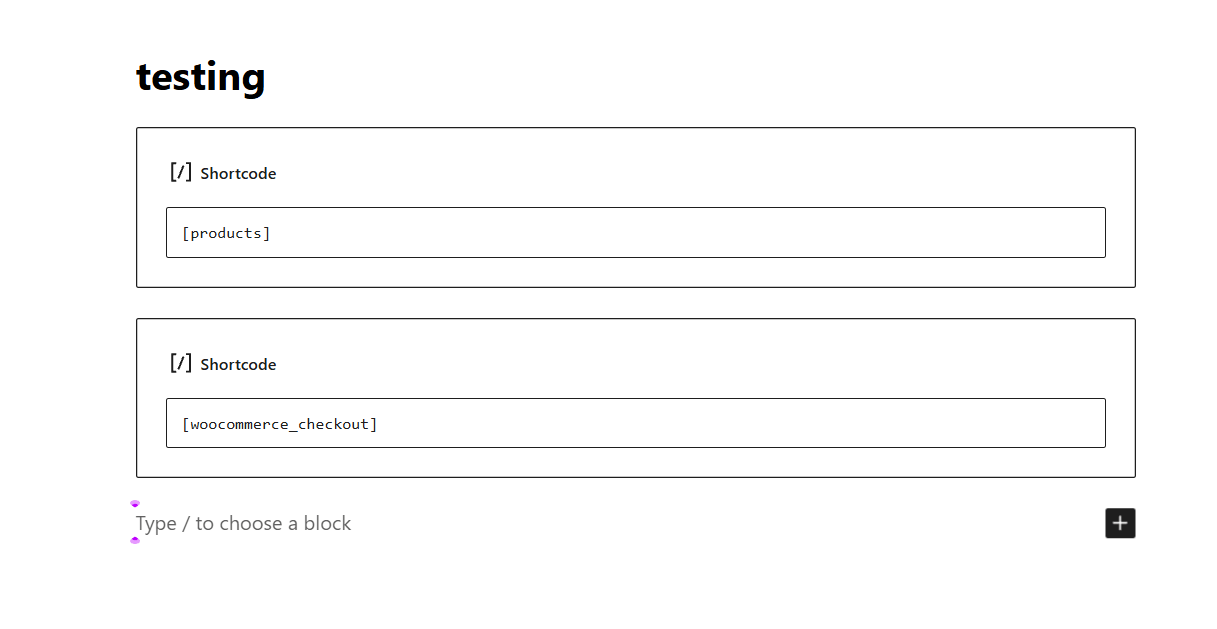
You create a custom page inside WordPress first. Then you place the product and checkout shortcodes together. Both shortcodes must stay on the same page. This gives you a custom one page style.
- Product shortcode
[products]and checkout shortcode[woocommerce_checkout]. - Place both shortcodes on the same page.
Example Use
This approach is useful for special selling pages. It works well for offer pages and promos. Many people use it for sales campaigns. It can also fit a custom landing page setup.
- Sales page for a specific product offer.
- Offer page built for a limited campaign.
- Custom landing page with focused checkout flow.
Advantages
The main benefit is design freedom and control. It can work with page builders in many cases. You do not need an extra plugin for this. Still, careful testing makes everything safer.
- Full design control for your custom page layout.
- Works with page builders and custom sections.
- No extra plugin needed for this setup.
Disadvantages
This method can feel harder for beginners. It needs testing to avoid checkout bugs. Theme conflicts are also possible with shortcodes. So it is powerful, but needs more care.
- Needs testing before using on live stores.
- Not beginner-friendly for many store owners.
- Theme conflicts are possible, depending on your theme.
Final Recommendation
Choosing the right method depends on your store’s goal. Each method solves a different checkout need. If you want fewer issues, use the plugin method. If you want speed, use the redirect option.
- Best result → Official One Page Checkout plugin
- Fast buying → Skip cart method
- Custom design → Shortcode method
Which Product Types Support One Page Checkout in WooCommerce
One page checkout works best with product types that can move through payment without complex extra steps. Knowing which products usually work well helps you avoid compatibility issues before enabling the same checkout flow across the store.
- Simple Products: Simple products usually work well because buyers can add the item and complete payment without extra option handling or complicated pre-purchase steps.
- Variable Products: Variable products can also work well when the checkout layout supports option selection clearly and keeps variation choices easy to understand.
- Virtual And Downloadable Products: Virtual and downloadable items often work especially well because fewer required fields keep checkout shorter, cleaner, and easier to complete.
- Donation And Non-Physical Purchase Flows: This setup can also support one-page checkout for non-profit WooCommerce stores when donations or similar payments need fewer checkout fields.
- Subscription And Booking Products: Subscription or booking products may work well, but they need careful testing because recurring billing or date selection adds complexity.
- Bundle And Composite Products: Bundles and composite products can work, though compatibility depends on how product relationships and checkout updates behave together.
- Products With Extra Add-Ons: Products using uploads, custom fields, or advanced add-ons may need extra testing because these elements can affect layout and checkout behavior.
Where to Apply One Page Checkout Rules in WooCommerce
One page checkout rules control where the checkout form appears and how buyers move from product selection to payment. Applying these rules in the right locations helps keep the buying flow clear, consistent, and easier to manage across different store pages.
- On Individual Product Pages: You can turn a single product page into a direct checkout view by enabling one page checkout from that product’s settings.
- On Custom Landing Pages: Dedicated landing pages work well for promotions, focused offers, or short campaigns where buyers should move directly to payment.
- In Global Plugin Settings: Some plugins let you control checkout behavior across the store. A proper WooCommerce one-page checkout setup helps those rules apply more consistently.
- With Validation And Conditional Rules: Extra conditions can limit one page checkout by country, cart total, product type, or user role when needed.
- By Choosing the Right Placement: Product pages, landing pages, and global rules each serve different goals, so placement should match how customers are expected to buy.
Common Problems When Enabling One Page Checkout for All Products
Enabling one page checkout for all products can speed things up, but it can also create issues. When everything loads on one screen, small conflicts become more visible. Most problems are technical, not serious, and can be fixed with simple checks. Below are common problems and clear ways to fix them.
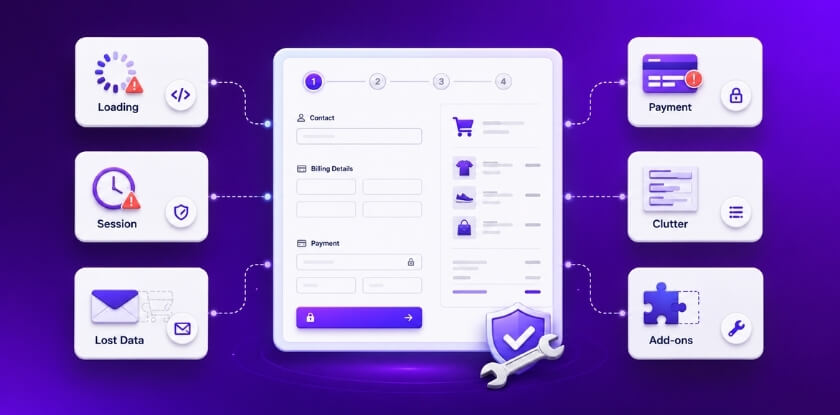
Infinite Loading Spinner
The checkout page keeps loading when users change quantity or shipping options. Nothing updates, and the spinner never stops. This usually happens due to JavaScript conflicts between the theme, checkout scripts, or security and optimization plugins running in the background.
Fix
- Open the browser console using F12 and check JavaScript errors
- Go to WooCommerce > Status and review outdated template overrides
- Disable Cloudflare Rocket Loader if it is active
Missing Payment Fields
Payment fields like credit card inputs do not appear. Sometimes the Place Order button does nothing when clicked. This often happens when the site is not secure or when the payment gateway is not fully compatible with one page checkout layouts.
Fix
- Make sure SSL is active, and the site uses HTTPS
- Check if the payment gateway supports one page checkout
- Update the payment plugin to the latest version
Session or Nonce Expired Errors
Users fill the form, click submit, and then see a session expired error. This usually happens when checkout pages are cached too long. Cached pages break secure checkout tokens, especially on shared hosting or aggressive cache setups.
Fix
- Exclude checkout pages from caching plugins
- Disable page caching for logged-in users
- Set cache control headers to private or no-cache
Cluttered Checkout Page
The checkout looks crowded with too many fields showing at once. On mobile screens, this feels overwhelming. Users may leave without finishing because the page looks long and confusing, even if the product and price are good.
Fix
- Enable accordion or step-based layouts
- Remove unused fields like company name or second address line
- Test the layout on mobile devices
No Abandoned Cart Data
You cannot recover abandoned carts because email data is not saved early. Since checkout and cart are combined, the email only saves after order placement, which means you lose contact details when users leave midway.
Fix
- Install an abandoned cart plugin with AJAX email capture
- Make the email field appear early in the form
- Test if emails save before order completion
Broken Add-on Layouts
Extra fields like file uploads or gift messages appear broken or missing. This happens because some add-ons are not built for compact checkout layouts and need more space or different templates to work properly.
Fix
- Switch to the Single Product checkout template
- Disable conflicting add-on plugins and test one by one
- Check the add-on plugin compatibility notes
One page checkout works well when set up carefully. Most issues come from caching, scripts, or layout overload. Testing changes step by step helps catch problems early. Fixing these common issues keeps checkout fast and user-friendly.
How to Test One Page Checkout Across All Products?
Testing one page checkout across all products helps catch problems before they affect real buyers. Because product selection, checkout fields, shipping, and payment all work together on one screen, small issues can interrupt the full order flow if they are not checked early.
Use the checkpoints below to test the setup more safely and thoroughly.
- Enable Test Mode And Sandbox Setup: Use payment gateway test mode and a staging site first so failed payments, script errors, or layout issues do not affect real customers.
- Check Core Checkout Behavior: Make sure quantities, product options, coupons, totals, and required fields update correctly without breaking the checkout flow.
- Test Mobile And Browser Usability: Review the page on phones and major browsers to confirm buttons, fields, and layout stay easy to use.
- Review Speed And Page Stability: Test page load time, exclude checkout from caching conflicts, and watch for session, script, or nonce-related errors.
- Verify Payment Gateway Response: Confirm test cards, sandbox transactions, and payment confirmations work properly from checkout submission to order completion.
- Check Shipping And Tax Updates: Make sure shipping methods, taxes, and location-based changes respond correctly across different product and order combinations.
- Confirm Post-Purchase Results: Place full test orders and verify order status, saved details, confirmation pages, and emails all work as expected.
- Repeat Tests After Changes: Run the same checks again after plugin updates, theme changes, or checkout edits to keep the storewide flow stable.
Frequently Asked Questions
These are some of the most common questions store owners ask after setting up one page checkout. The answers below focus on practical concerns that usually come up during testing, launch, and day-to-day store use.
Can One Page Checkout Increase Conversion Rates In WooCommerce?
Yes, one page checkout can improve conversions by reducing extra steps between product selection and payment. A shorter checkout flow often helps buyers stay focused and complete orders faster.
Is One Page Checkout Safe For Payments In WooCommerce?
Yes, one page checkout is safe when your store uses SSL, secure hosting, and trusted payment gateways. Payment safety depends more on overall store security than on the checkout layout itself.
Does One Page Checkout Work With Guest Checkout?
Yes, one page checkout usually works well with guest checkout. This combination helps first-time buyers complete purchases faster without needing to create an account first.
Can You Show One Page Checkout Only For Selected Products?
Yes, many plugins let you enable one page checkout only for specific products, categories, or page types. This is useful when some products need a faster checkout flow, and others do not.
Will One Page Checkout Affect Taxes And Shipping Calculations?
No, taxes and shipping can still update normally in one page checkout. The important part is making sure your plugin, shipping rules, and address-based calculations are configured correctly.
Can One Page Checkout Work With Multi-Currency Stores?
Yes, one page checkout can work with multi-currency stores if the currency switcher and checkout plugin are compatible. Testing is important to make sure prices and totals update correctly during checkout.
End Note
You can enable one page checkout by using a trusted plugin, skipping the cart page, or creating a custom checkout page with shortcodes. Each option reduces extra steps and speeds up payments. This clearly answers how to enable one page checkout for all products in WooCommerce?
Before using it live, test checkout on mobile and desktop screens. Keep fields simple and remove anything not needed. Review settings after updates to avoid errors later. With careful setup and regular checks, your store can grow smoothly. Best wishes for your WooCommerce success.