WooCommerce one page checkout lets shoppers view product details, enter checkout information, and complete payment in a single flow. It is commonly used to shorten the buying process and reduce the number of steps between product selection and order completion.
In this guide, we’ll walk you through how to setup WooCommerce one page checkout step by step. You will learn what to prepare before setup, how to place one page checkout on the right pages, how to adjust the flow for easier buying, and what to test before making it live.
Quick Steps to Setup WooCommerce One Page Checkout
Setting up WooCommerce one page checkout usually involves choosing the right method, placing checkout in the right location, and testing the full order flow before launch. The goal is to keep setup simple while making sure the buying process still works properly across devices and payment methods.
- Choose a one page checkout plugin or setup method
- Install and activate the solution
- Enable one page checkout settings
- Add checkout to the right page or product flow
- Remove unnecessary checkout fields
- Review layout, payment, and shipping behavior
- Test the full process on desktop and mobile
- Place a complete test order before going live

What Is One Page Checkout in WooCommerce
One page checkout in WooCommerce is a checkout setup that lets shoppers review product details, enter their information, and complete payment in one continuous flow. Instead of moving through separate cart and checkout steps, the full purchase process happens in a single place.
This checkout usually includes the key parts of the buying process in one view.
- Product selection or order review appears on the same page as checkout.
- Billing, shipping, and payment fields are shown without extra page changes.
- Buyers can complete the order with fewer steps and less navigation.
- The setup works best when the purchase flow needs to feel faster and more direct.
- It differs from the default WooCommerce checkout, which usually separates cart and checkout into different stages.
When One Page Checkout Works Best
This checkout style works best when the buying process needs to feel faster, simpler, and more direct. It is most effective in shopping flows where fewer steps can help buyers complete the order with less delay.
Here are the situations where one page checkout usually works best.
- Single-Product Offers: Best for stores selling one main product where buyers do not need extended comparison or browsing.
- Focused Landing Pages: Works well on campaign pages designed to guide visitors toward one clear buying action.
- Mobile-First Stores: Helps mobile shoppers complete orders faster by reducing page changes and keeping checkout in one flow.
- Fast Repeat Purchases: Useful when returning customers want to buy again without moving through extra cart steps.
- Paid Traffic Campaigns: Supports faster decisions when ad traffic lands on pages built for quick conversions.
- Simple Buying Journeys: Ideal when products do not require complex configuration, long forms, or detailed pre-purchase steps.
What You Need Before Setting Up WooCommerce One Page Checkout
Before setting up WooCommerce one page checkout, make sure the basic store setup is already working properly. A smoother setup usually depends on having products, payments, shipping, and checkout behavior ready before you place everything into a single checkout flow.
Here are the main things to prepare before setup.
- WooCommerce Setup: Make sure WooCommerce is installed, active, and working correctly on your store.
- Products Ready: Confirm that the products, variations, pricing, and stock settings are already set up properly.
- Payment Methods Configured: Check that your payment gateways are active and able to process test and live orders.
- Shipping Settings Reviewed: Make sure shipping zones, methods, rates, and delivery rules are already configured.
- Checkout Fields Reviewed: Decide which fields are necessary so the one page checkout stays simple and relevant.
- Page Placement Planned: Choose where the one page checkout will appear, such as product pages, shop pages, or landing pages.
- Plugin Or Method Selected: Pick the WooCommerce one page checkout plugin or setup method you want to use before starting configuration.
- Testing Process Ready: Be prepared to test checkout on desktop and mobile before making the setup live.
How to Setup WooCommerce One Page Checkout?
One-page checkout lets customers choose a product and complete payment on the same page. This makes buying faster and helps reduce cart abandonment.
There are several ways to set up WooCommerce one page checkout. Let’s start with the easiest one.
Method 1: Use a One Page Checkout Plugin (Best and Easiest)
This is the most beginner-friendly method. No coding knowledge is needed. The main challenge is choosing the right plugin because many options are available.
To keep things simple, we will use One Page Quick Checkout for WooCommerce, which works well if you want an instant checkout for WooCommerce without adding extra steps for customers. The plugin is easy to use and comes in both free and paid versions.
Step 1: Install the Plugin
Installation (Free Version)
- Go to the WordPress Admin Dashboard
- Click Plugins → Add New
- Search for One Page Quick Checkout for WooCommerce
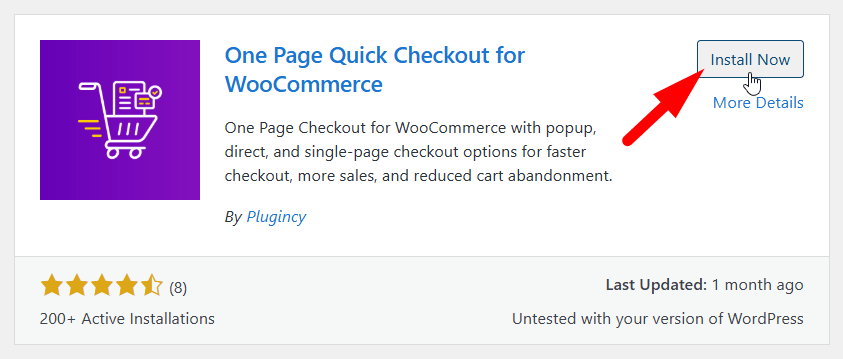
- Click Install Now, then Activate
Installation (Pro Version)
- Purchase the Pro version from the official website
- Download the ZIP file from the email you received
- Go to Plugins → Add New → Upload Plugin
- Upload the ZIP file and click Install Now
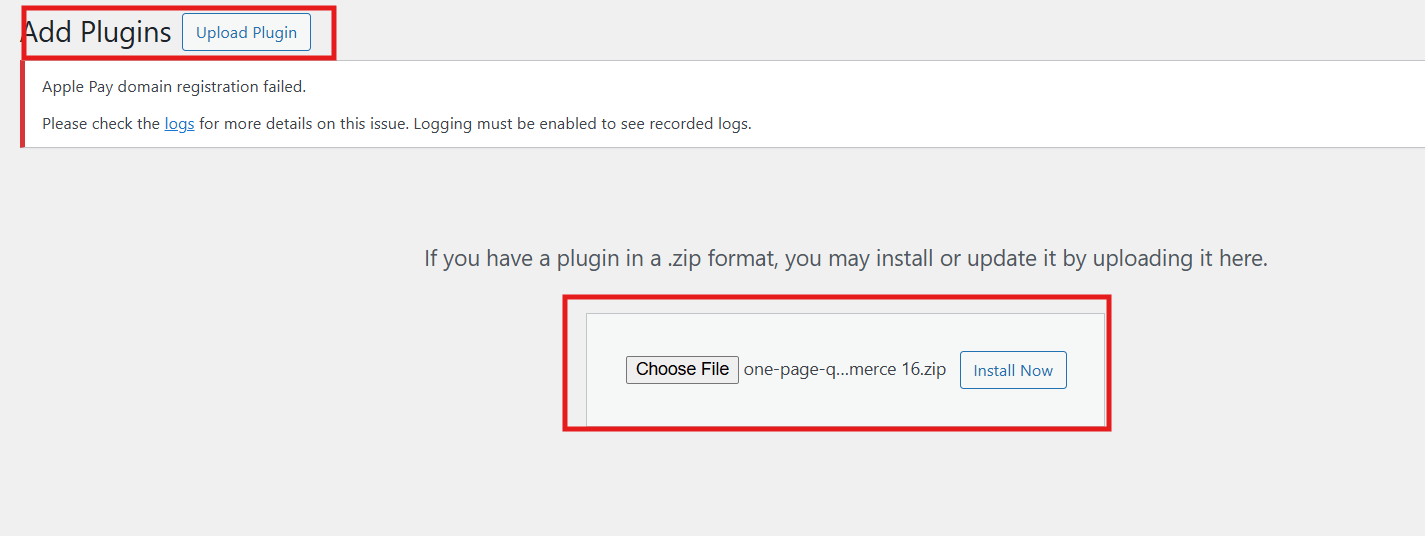
- Activate the plugin
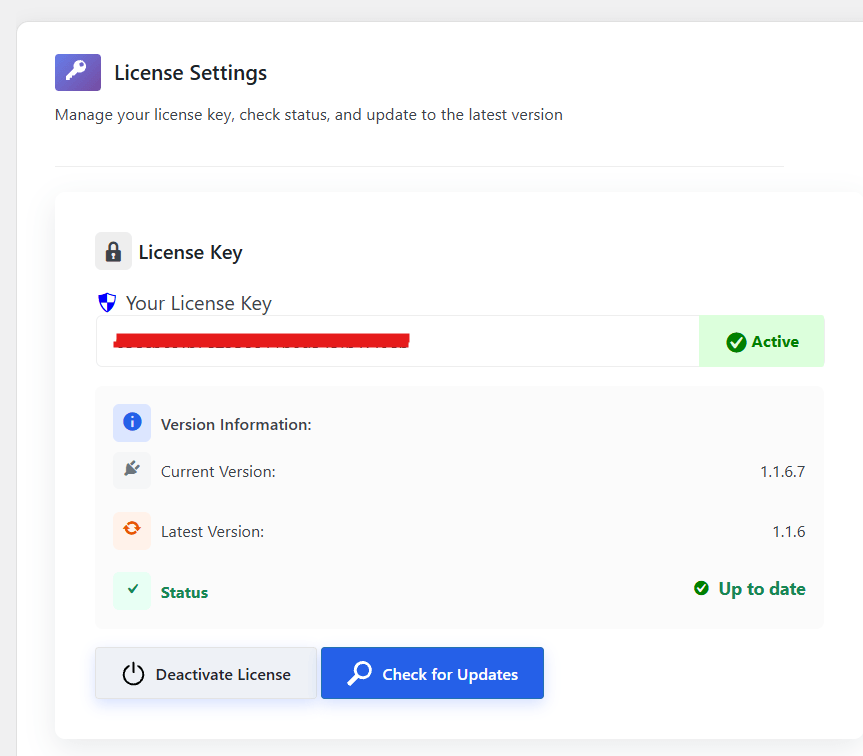
- Go to Onpage Checkout → Plugin License
- Enter your license key to unlock Pro features
Step 2: Types of One Page Checkout
You can set up one page checkout in two ways:
- Single product one page checkout
- Multi product one page checkout
Single Product One Page Checkout
- Go to Onpage Checkout in your WordPress dashboard
- Click One Page Checkout
- You will see two options:
- Enable One Page Checkout
- Enable for All Products
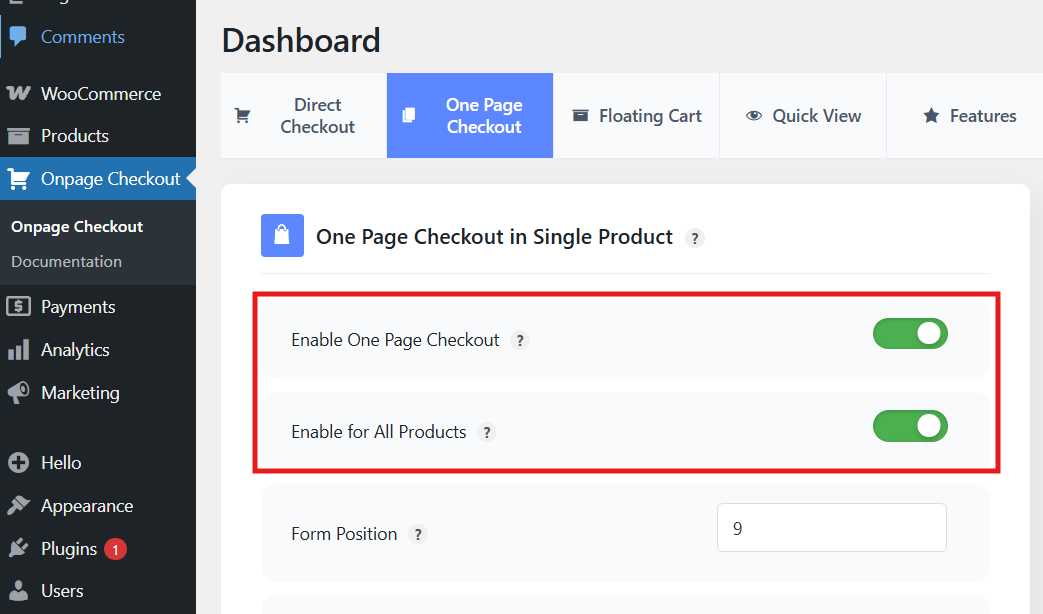
How These Options Work
- Enable One Page Checkout: Use this option if you want one page checkout only for selected products. (You must edit each product and enable one page checkout from Product Data section).
- Enable for All Products: This option applies one page checkout to every product automatically.
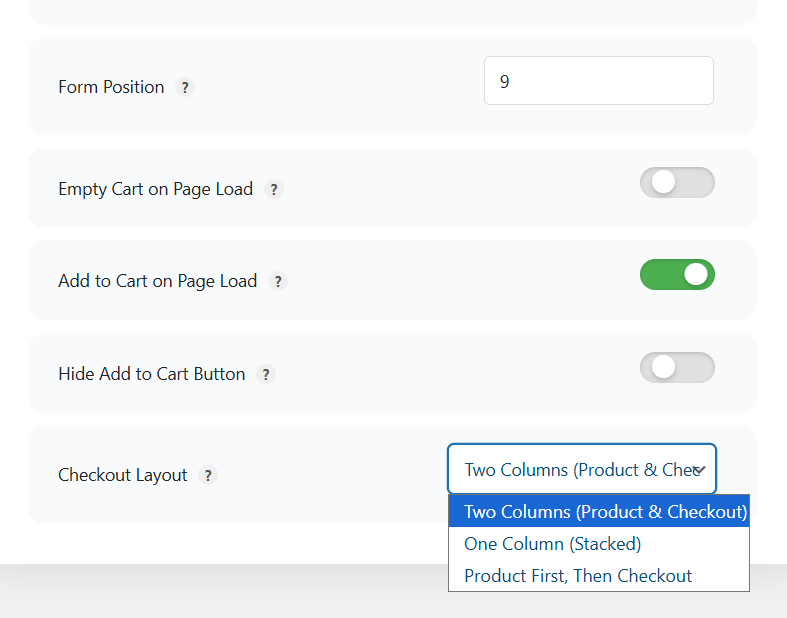
Additional Configuration Options
You can adjust these settings to control how checkout works:
- Form Position
- Empty Cart on Page Load
- Add to Cart on Page Load
- Hide Add to Cart Button
- Checkout Layout
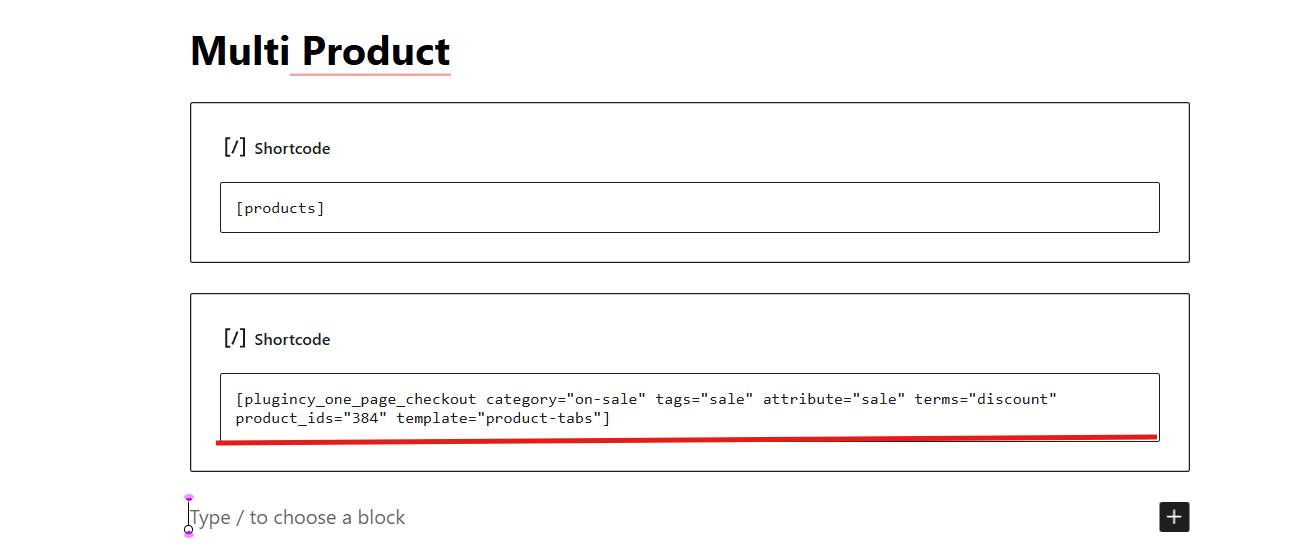
Multi Product One Page Checkout
This setup allows customers to choose multiple products and check out on the same page.
Using the Shortcode
[plugincy_one_page_checkout category="" tags="" attribute="" terms="" product_ids="" template="product-tabs"]
Shortcode Attributes Explained
- category
- tags
- attribute
- terms
- product_ids
- template
Available templates include product-table, product-list, product-single, product-slider, product-accordion, product-tabs, and pricing-table.
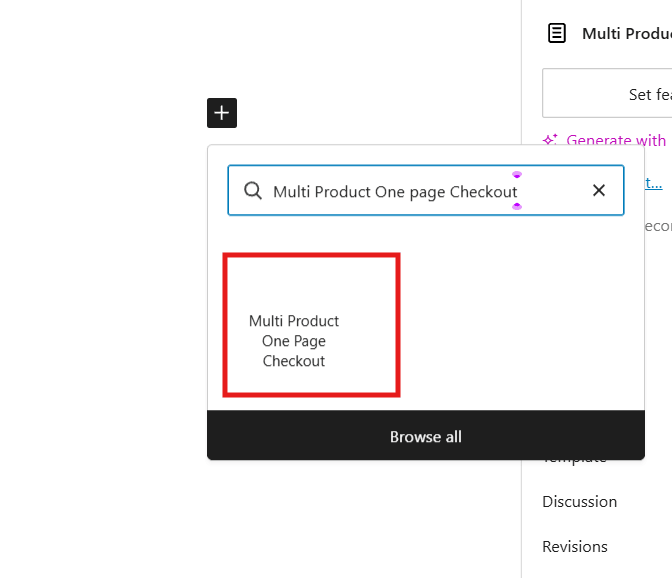
Using WordPress Blocks
- Open the page editor
- Search for Multi Product One Page Checkout blocks
- Select products and layout
- Adjust styling if needed
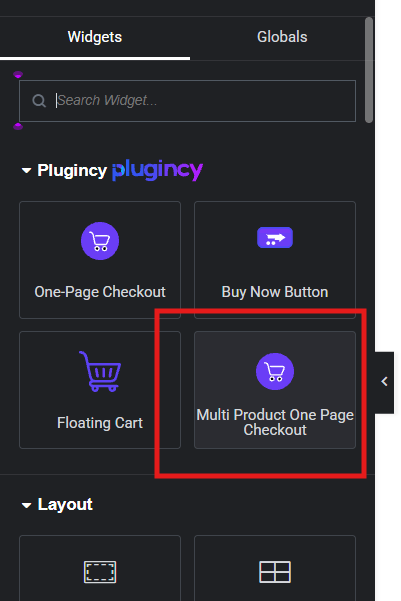
Using Elementor
- Open a page with Elementor
- Search for the Multi Product One Page Checkout widget
- Select products and layout
- Style the widget as needed
Why This Method Works Well
- No coding needed
- Faster checkout
- Helps reduce cart abandonment
Method 2: Create a One Page Checkout Using WooCommerce Shortcodes
This method gives you more control and works without using an extra one page checkout plugin.
Steps
- Go to Pages → Add New
- Add the checkout shortcode:
[woocommerce_checkout] - Add product shortcodes above the checkout form (so users can pick a product first)
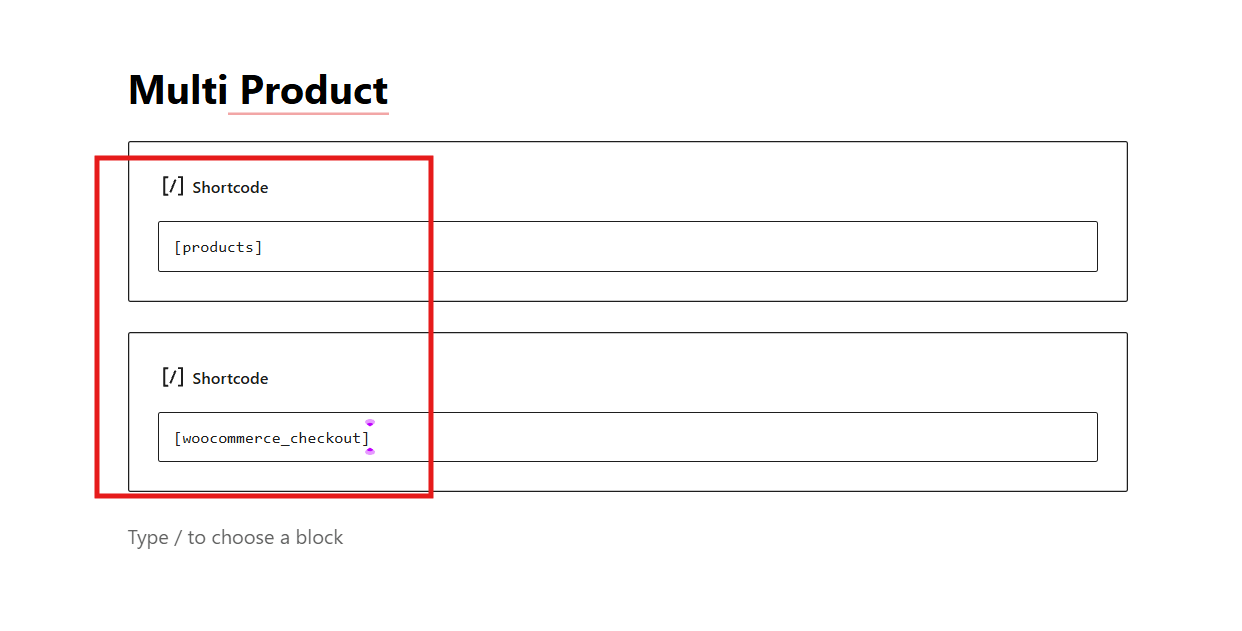
- Publish the page
- Set this page as your checkout page (WooCommerce settings)
Best For
- Simple stores
- One or two products
- Custom page layouts
Method 3: Use a Page Builder (Elementor or Similar)
If you already use a page builder, this method is flexible and gives you full layout control.
Steps
- Create a new page
- Open it with your page builder
- Add product widgets (or product blocks)
- Add the checkout form widget (or shortcode block)
- Arrange everything on one page
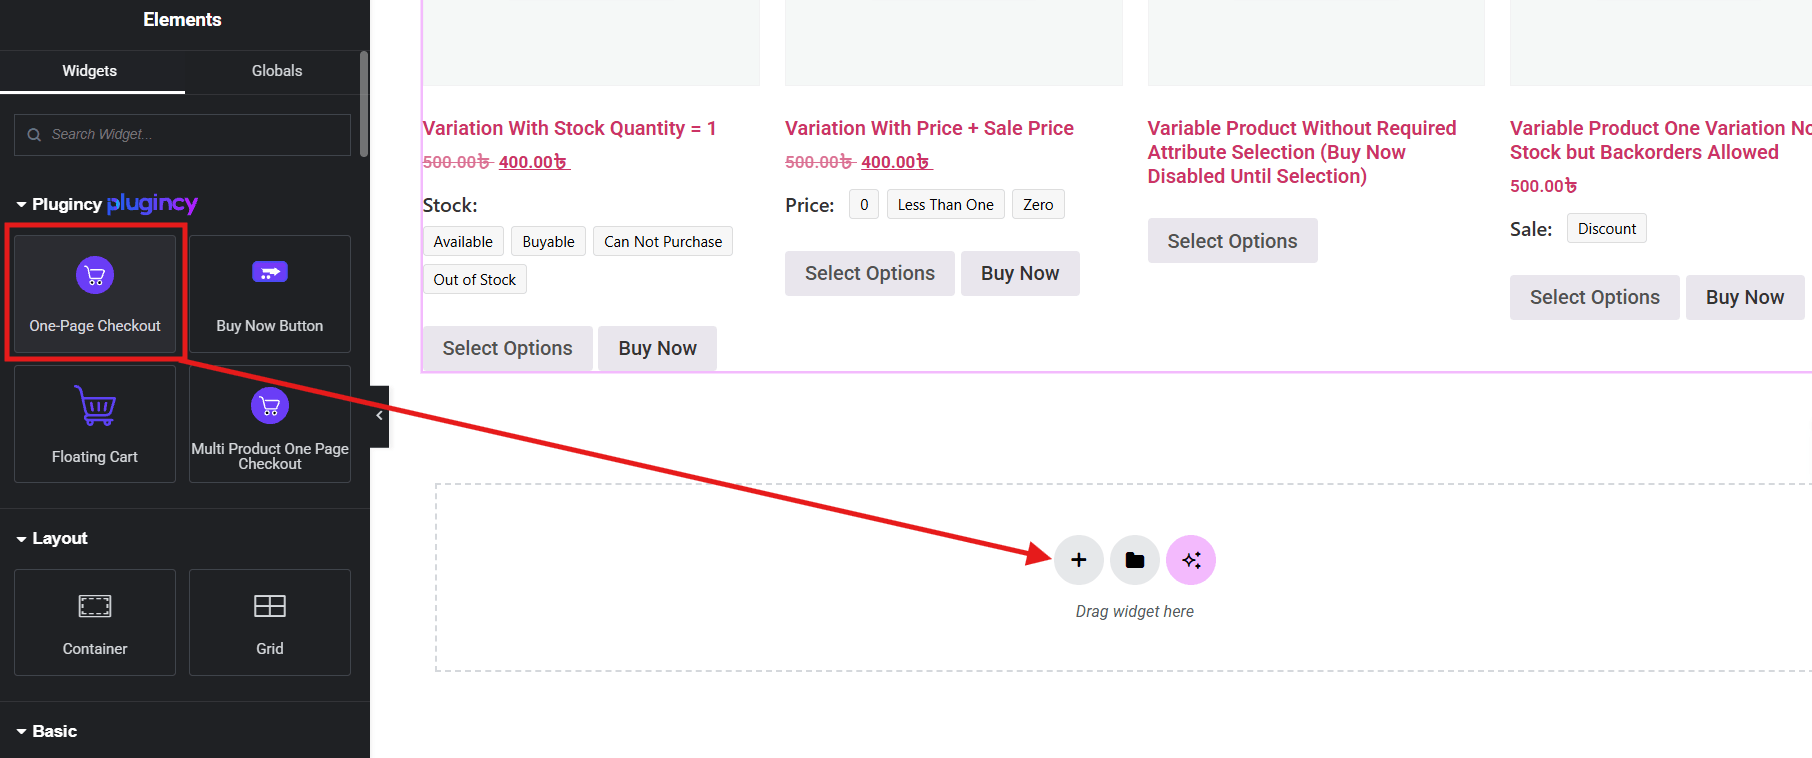
- Publish the page
Why People Like This Method
- Full design control
- Clean layout
- Mobile friendly
What Type of Stores Benefit Most From One Page Checkout?
One page checkout works best for stores that need faster buying, fewer steps, and a more direct path to payment. Some store types benefit more because their customers value speed, simplicity, and less decision-making during checkout.
- Digital And Virtual Product Stores: These stores usually need fewer checkout fields, so simplifying WooCommerce checkout for digital goods keeps the process shorter and helps buyers access products faster.
- Impulse Buy And Low-Ticket Retailers: Fast-moving, lower-priced products convert better when shoppers can complete the purchase quickly without extra steps or second thoughts.
- Mobile-First Online Shops: Stores with heavy mobile traffic benefit from fewer page changes, easier taps, and a smoother checkout experience on smaller screens.
- Subscription-Based Services: Memberships and recurring plans benefit from showing pricing, billing, and payment details together in one clear checkout flow.
- Small Catalog And Repeat Order Stores: Stores with limited product ranges or repeat buyers benefit when checkout stays fast, simple, and easy to complete again.
Common Issues When Setting Up One Page Checkout
Setting up one page checkout can improve buying speed, but it can also create problems if the layout, performance, or tracking is not planned properly. The most common issues usually affect usability, speed, recovery, and compatibility, especially when everything is placed into a single checkout flow.
Slow Page Performance And Load Times
One page checkout places product review, billing, shipping, and payment on the same screen. That can make the page heavier and slower to load, especially on mobile devices or weaker networks. When checkout feels slow before users even begin, it can reduce trust and increase exits.
Solution: Optimize images, reduce unnecessary scripts, use caching where possible, and test the checkout page speed on both desktop and mobile before launch.
Visual Overload And Cluttered Layouts
When too many fields and sections appear at once, the checkout page can feel crowded and hard to complete. Poor spacing, unclear grouping, and long forms make the process feel more difficult than it should, which can increase hesitation before payment.
Solution: Keep only necessary fields, group related sections clearly, use better spacing, and remove any element that does not directly support order completion.
Limited Tracking Of User Drop-Offs
In a multi-step checkout, it is easier to see where users leave. In a one page flow, exits are less obvious because the whole process happens on one screen. This can make it harder to identify whether users are dropping off at shipping, payment, or form completion.
Solution: Use event tracking, form analytics, or heatmaps to monitor clicks, field interaction, errors, and abandonment behavior across the checkout page.
Missing Email And Lead Data
Many one page checkout setups only capture user details after full submission. If shoppers leave partway through, their contact details may never be saved. That makes it harder to send abandoned cart reminders or recover incomplete orders later.
Solution: Add early email capture where possible, or connect recovery tools that can record partial checkout activity before the order is submitted.
Plugin Conflicts And Loading Errors
One page checkout often depends on live updates for totals, shipping, and payment sections. Theme conflicts, plugin overlaps, or incomplete configuration can cause broken fields, endless loading states, or checkout sections that stop updating properly.
Solution: Check compatibility with payment and shipping plugins, and review AJAX behavior carefully before you enable one page checkout for all WooCommerce products across the store.
Fewer Chances For Add-On Sales
A single-page layout gives you less room to promote extra offers without making the screen feel crowded. Upsells, warranties, or cross-sells can become distracting if they are inserted poorly, which may reduce clarity instead of increasing order value.
Solution: Keep add-on offers minimal, relevant, and well-placed so they support the purchase without interrupting the main checkout flow.
Frequently Asked Questions
Setting up WooCommerce one page checkout often brings up a few practical questions after the main configuration is finished. The answers below cover common concerns that usually come up when store owners start testing, refining, and deciding whether the setup is right for their store.
Does WooCommerce Have Built-In One Page Checkout?
WooCommerce does not provide a full one page checkout setup by default for most store needs. Store owners usually create it with a dedicated plugin, a custom page layout, or a builder-based checkout flow.
Does One Page Checkout Work Well On Mobile Devices?
Yes, one page checkout can work well on mobile when the layout is clean, fast, and easy to use. It usually performs best when fields are limited, buttons are easy to tap, and the page does not feel crowded.
Can One Page Checkout Be Added To Product Pages?
Yes, many one page checkout setups can be placed directly on product pages. This works well when you want customers to move from product selection to payment without extra cart steps.
Do I Need Coding Knowledge To Set Up One Page Checkout?
In most cases, no coding knowledge is required if you use a plugin or builder-based method. Technical work is usually only needed when you want deeper custom behavior or a highly tailored layout.
How Do I Test One Page Checkout Safely Before Going Live?
The safest approach is to test the full order flow on a staging site or in a controlled setup first. Check product selection, payment, shipping, mobile usability, confirmation pages, and order emails before enabling it for real customers.
Conclusion
One page checkout brings products and payment together to save time and reduce confusion. With the right method, stores can guide buyers smoothly from choice to payment. Plugins, shortcodes, and builders each fit different needs, which clearly explains how to setup woocommerce one page checkout.
Before you apply it, test layouts, payments, and mobile views carefully. Keep forms short, pages fast, and updates regular. Start simple and improve step by step. With patience and smart choices, your checkout can grow stronger. Best wishes for your store’s success ahead.