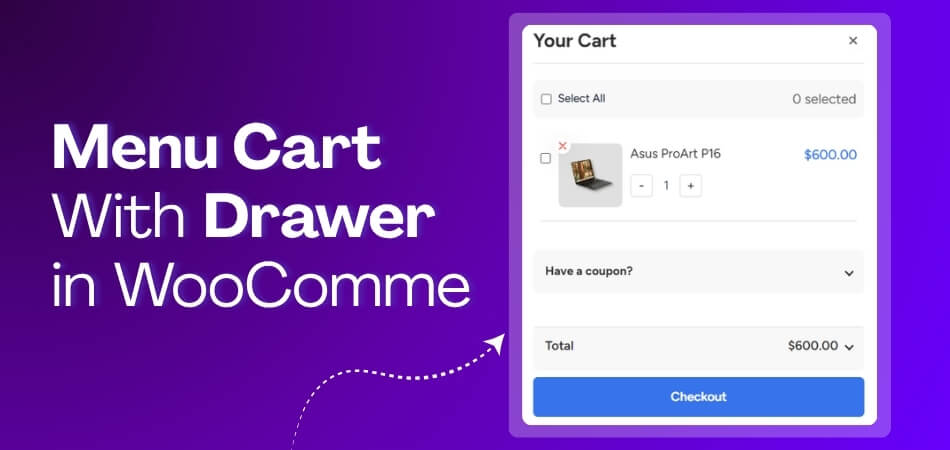
A menu cart with drawer in WooCommerce lets shoppers open their cart from the header menu without leaving the current page. Instead of sending users to the default cart page, it shows a slide-out drawer with cart items, quantity controls, subtotal, and checkout buttons.
This setup makes the shopping flow faster and easier, especially for stores using AJAX add to cart or mobile-first layouts. In this guide, you’ll learn how to add a menu cart with drawer in WooCommerce using a plugin, theme/builder option, or custom setup, plus how to test and optimize it for a smoother checkout experience.
Quick Tips for Adding a Menu Cart With Drawer in WooCommerce
Menu cart drawers should make it easier for shoppers to check their cart without leaving the page they are on. Keep the drawer simple, quick to open, and clear enough so customers can review items and move to checkout without confusion.
- Use a menu cart drawer plugin
- Place the cart icon where shoppers expect it
- Let the drawer update without page reloads
- Show product name, image, and subtotal
- Add quantity change and remove options
- Keep the checkout button easy to notice
- Make sure it works well on mobile
- Test the full cart and checkout flow
What a Menu Cart Drawer Is and Why Stores Use It
Shoppers often want to check their WooCommerce cart without leaving the product page, shop page, or category page. A menu cart drawer makes that easier by adding a cart icon or cart summary to the header menu. When clicked, it opens a slide-out cart panel where customers can review added products, update quantities, remove items, check the subtotal, and continue to the checkout page from the same screen.
Stores use it because it:
- Keeps the cart visible in the header menu
- Lets shoppers review cart items faster
- Reduces extra visits to the cart page
- Works well with AJAX add to cart
- Makes mobile cart access smoother
- Supports a cleaner checkout flow
- Helps customers move toward checkout faster
How to Add a Menu Cart With Drawer in WooCommerce?
This is the main setup section where you choose the method that fits your store setup. Each method works, but the right choice depends on your theme type, design flexibility, and how much control you want over the cart experience. After setup, always test the add-to-cart behavior on both mobile and desktop.
Method 1: Use the WooCommerce Mini-Cart Block for Block Themes
WooCommerce’s Mini-Cart block is a native option for stores using block themes and the Site Editor. It lets you add a cart icon or mini cart area to the header, so shoppers can check cart contents without opening the default cart page. This method is lightweight because it does not require an extra cart drawer plugin.
Step-by-step setup:
- Go to Appearance > Editor and open your Header template part.

- Click inside the header area and open the block inserter.
- Search for Mini-Cart and insert the block near your navigation menu.
- Open the Mini-Cart block settings and choose the available display behavior for your theme.
- Save the header and test the cart from the frontend.
Customize the Mini-Cart area:
From the Mini-Cart block settings, check if your theme allows drawer, popover, or template customization. Then adjust the cart area so it matches your store design and checkout flow.
Focus on:
- Cart totals
- Checkout button
- View cart button
- Empty cart message
- Drawer or popover layout
- Spacing and mobile alignment
After customizing, add a product to the cart and confirm that the item count, subtotal, and checkout link update correctly.
Best for: Stores using block themes that want a native WooCommerce cart option without installing any plugin.
Method 2: Drawer With One Page Quick Checkout for WooCommerce
This method combines a menu cart drawer with a one-page checkout flow, allowing shoppers to move from browsing to payment with fewer steps. It is ideal when instant checkout for WooCommerce is a key goal.
Install the Plugin
Free version
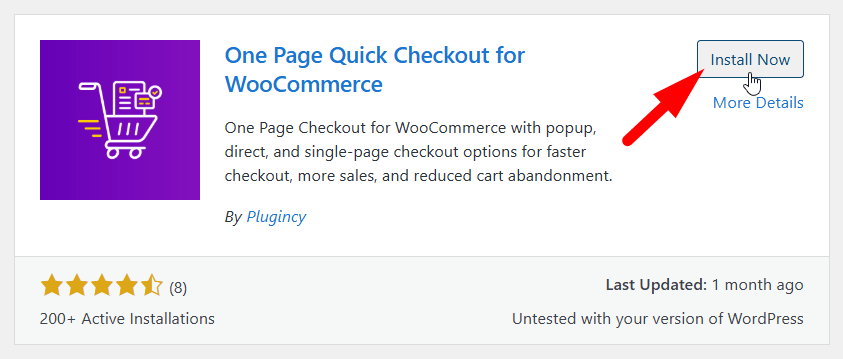
- Go to Plugins > Add New
- Search for One Page Quick Checkout for WooCommerce
- Click Install Now, then Activate

PRO version
- Purchase the PRO plugin from the official website
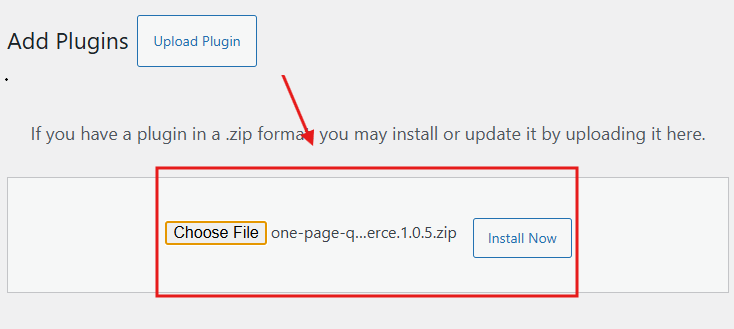
- Download the ZIP file from your email
- Go to Plugins > Add New > Upload Plugin
- Upload the ZIP, install, activate, and enter the license key

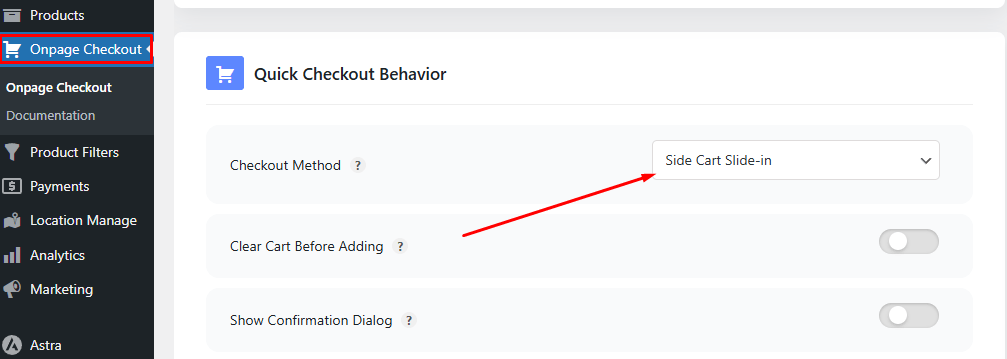
Configure Menu Cart Settings
- Go to Dashboard>One Page Checkout
- Adjust General Settings
- Choose Slide Cart Slide-in From Quick Checkout Behavior
- Save changes

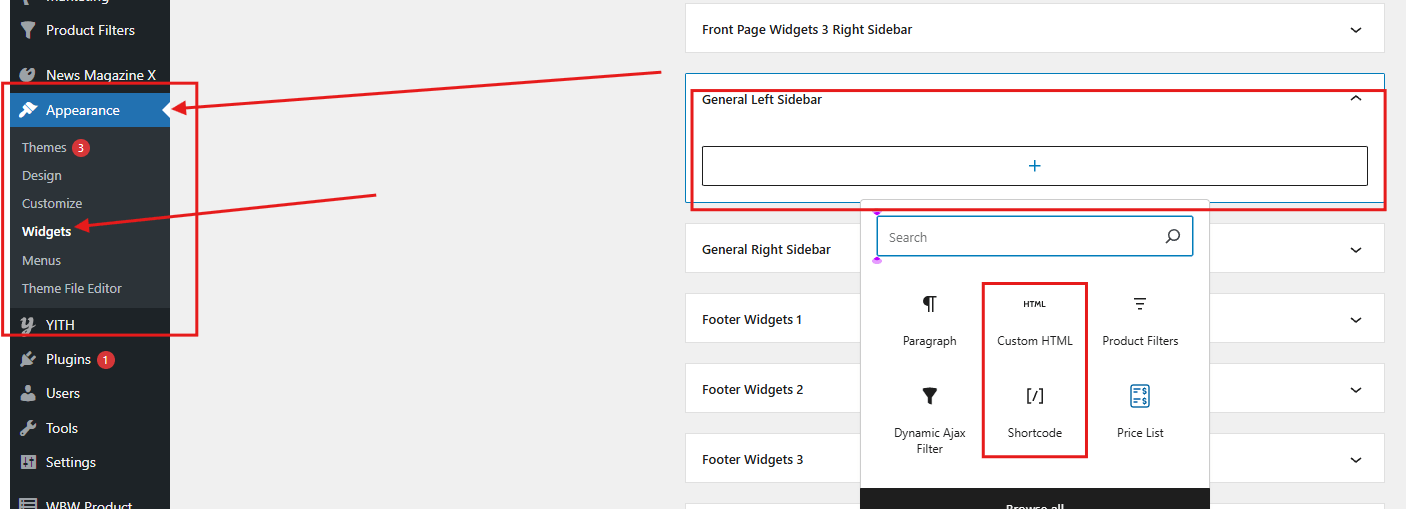
Integration in Widgets and Sidebar Areas
The steps for widget and sidebar integration are the same. You can add the cart in three different ways based on your editor preference.
1. Use Shortcode
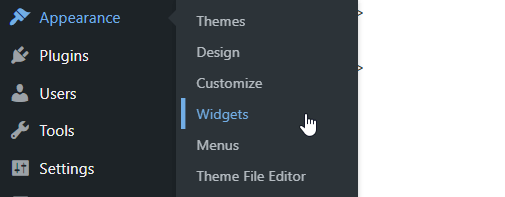
- Go to Appearance > Widgets
- Add a Shortcode, Text, or Custom HTML widget

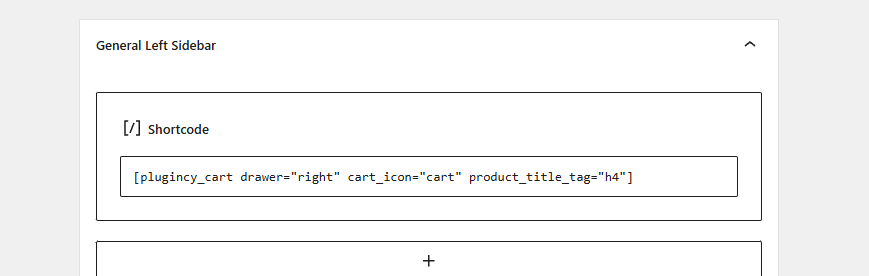
- Insert the shortcode below
plugincy_cart drawer=”right” cart_icon=”cart” product_title_tag=”h4″
Paste the shortcode inside square brackets and remove the inverted commas before saving.
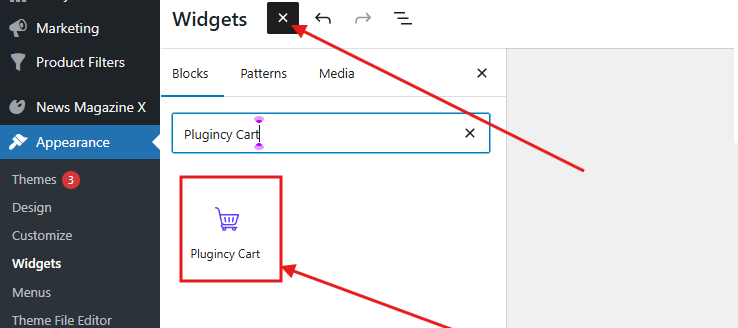
2. Use Plugincy Cart Blocks
- Open the block editor
- Search for Plugincy Cart
- Drag and drop the Plugincy Cart block into the widget or sidebar area for quick integration
3. Use Elementor Plugincy Cart Widget
- Open the page or layout in Elementor

- Search for the Plugincy Cart widget
- Drag it into your desired section to display the cart visually

Method 3: Add a Cart Icon to the Menu With a Menu-Cart Plugin
Menu-cart plugins are useful for classic WooCommerce themes that do not use block-based headers. They usually add a cart icon, item count, subtotal, or mini cart preview inside the navigation menu.
However, not every menu-cart plugin creates a true slide-out drawer. Some only show a cart icon, dropdown, or flyout preview. If your goal is a full drawer, choose a plugin that clearly supports off-canvas cart, side cart, or drawer behavior.
Step-by-step setup:
- Go to Plugins > Add New.
- Search for a WooCommerce menu-cart plugin.
- Install and activate the plugin.
- Open the plugin settings.
- Choose the menu where the cart icon should appear.
- Select how the cart should display, such as icon only, icon with item count, or icon with subtotal.
- Save the settings and test the cart icon on the frontend.
Styling and placement tips:
Keep the cart label short so the header does not feel crowded. Test the cart icon on mobile menus, sticky headers, and desktop navigation before making it live.
Check these areas:
- Header alignment
- Mobile menu spacing
- Cart icon visibility
- Item count display
- Sticky header behavior
- Dropdown or flyout behavior
If the icon looks misaligned, check your theme’s menu spacing before adding custom CSS.
Best for: Classic theme stores that mainly need a cart icon or a simple cart preview in the main navigation menu.
Method 4: Use a Side Cart Plugin for a True Sliding Drawer
Side cart plugins are usually the best fit when you want a real slide-out drawer with more cart controls. These plugins often support AJAX updates, auto-open after add to cart, quantity changes, remove buttons, coupons, cart totals, and checkout shortcuts.
Step-by-step setup:
- Install and activate a WooCommerce side cart plugin that supports drawer layouts.
- Open the plugin settings.
- Enable the side cart or drawer option.
- Choose when the drawer should open, such as after clicking the cart icon or after adding a product to the cart.
- Configure the cart elements you want to show.
- Save the settings.
- Test the drawer on product pages, shop pages, and mobile screens.
Cart elements to include:
Keep the drawer useful, but avoid making it too crowded.
Include:
- Product image
- Product name
- Item quantity
- Remove item option
- Cart subtotal
- Coupon field, if needed
- View cart button
- Checkout button
Checkout and UX settings:
A side cart drawer should make the next step obvious. Keep the close button easy to tap on mobile and make the checkout button visible near the subtotal.
Also check:
- Drawer open speed
- Overlay behavior
- Mobile drawer width
- Auto-open behavior
- Quantity update speed
- Checkout button placement
Use auto-open carefully. It can improve cart visibility after add to cart, but it may feel distracting if it appears too often.
Best for: Stores that want a modern sliding cart drawer with stronger cart controls and checkout-focused features.
Method 5: Create a Custom Menu Cart Drawer With Code
Custom code gives developers full control over the cart icon, drawer markup, styling, behavior, and WooCommerce integration. This method avoids extra plugins, but it needs careful testing because cart fragments, AJAX add to cart, caching, and mobile layout can break if the setup is incomplete.
Basic setup process:
- Add a cart icon or cart link to your header using theme hooks or template files.
- Create a hidden off-canvas drawer container in the header or footer.
- Output the WooCommerce mini cart inside the drawer container.
- Add JavaScript to open and close the drawer.
- Add CSS to control the drawer position, overlay, width, and mobile layout.
- Test WooCommerce cart fragments so the drawer updates after AJAX add to cart.
Minimal starting snippet:
add_action(‘wp_footer’, function () {
?>
<div id=”wc-cart-drawer” class=”wc-cart-drawer” hidden>
<div class=”wc-cart-drawer__inner”>
<?php woocommerce_mini_cart(); ?>
<a class=”button” href=”<?php echo esc_url( wc_get_cart_url() ); ?>”>View cart</a>
<a class=”button checkout” href=”<?php echo esc_url( wc_get_checkout_url() ); ?>”>Checkout</a>
</div>
</div>
<?php
});
This snippet only creates the basic drawer structure. A production-ready version also needs:
- CSS for the drawer layout
- JavaScript for open and close behavior
- Close button controls
- Accessibility labels
- Keyboard focus handling
- AJAX refresh testing
- Cache compatibility checks
- Mobile responsive styling
Best for: Developer-managed WooCommerce stores that need full UI control and want to avoid third-party cart drawer dependencies.
Common WooCommerce Cart Drawer Issues and Fixes
After adding a menu cart with drawer in WooCommerce, some issues may appear because of caching, AJAX conflicts, duplicate cart triggers, theme headers, or mobile layout problems. Use this checklist to find what is breaking and fix the drawer before publishing it on a live store.
Cart Drawer Not Updating
Cart drawer content may stop updating when WooCommerce cart fragments, AJAX add to cart, or caching settings prevent the mini cart from refreshing. This can make the cart count, subtotal, quantity changes, or product list show old information.
Fix it by:
- Clearing site, browser, and CDN cache
- Testing the drawer with caching turned off
- Checking if AJAX add to cart works on shop and product pages
- Excluding cart, checkout, and dynamic cart content from full-page caching
- Avoiding delayed or deferred WooCommerce cart scripts
- Testing whether cart count and subtotal update after each cart action
Cart Drawer Opens Twice
Drawer double-opening usually happens when more than one cart drawer, mini cart, floating cart, or header cart trigger is active on the same page. A theme cart and plugin cart can also conflict if both try to control the same cart behavior.
Fix it by:
- Keeping only one cart drawer system active
- Disabling duplicate cart icons from the theme, plugin, or header builder
- Turning off extra floating cart or side cart options
- Checking if desktop and sticky headers both contain cart triggers
- Testing one cart feature at a time to find the conflict
Cart Drawer Does Not Open After Add to Cart
Drawer open behavior can fail when the open-on-add setting is disabled, AJAX add to cart is not working, or another plugin blocks the drawer trigger. This issue is common when multiple cart, popup, or checkout tools control the same add-to-cart action.
Fix it by:
- Enabling the open drawer after add to cart option
- Turning on AJAX add to cart where supported
- Testing with a simple product first
- Testing variable products after simple products work
- Temporarily disabling other popup, cart, or checkout plugins
- Checking browser console errors if the drawer still does not open
Cart Icon Missing From the Header Menu
Cart icons can disappear when the active header template does not include the cart block, shortcode, widget, or menu cart element. Some themes also hide extra header elements inside mobile menus or custom header layouts.
Fix it by:
- Checking the active header template or menu area
- Confirming the cart block, shortcode, or widget is placed correctly
- Testing desktop and mobile header layouts
- Checking whether the cart icon is hidden inside the mobile menu
- Clearing cache after changing the header
- Looking for CSS rules that hide the cart icon
Cart Drawer Looks Broken on Mobile
Mobile drawer issues often happen when the drawer width, overlay, button spacing, or header behavior is not responsive. This can make the cart hard to read, hard to close, or difficult to use on smaller screens.
Fix it by:
- Setting the drawer width for smaller screens
- Keeping close and checkout buttons easy to tap
- Reducing extra messages, upsells, or non-essential content
- Making sure the drawer appears above the sticky header
- Testing on real mobile devices
- Checking both portrait and landscape views
Checkout Button Not Working
The checkout button may fail when the WooCommerce checkout page is not assigned, the checkout URL is changed, or another checkout plugin controls the checkout flow. This can stop users from moving from the cart drawer to payment.
Fix it by:
- Checking the assigned checkout page in WooCommerce settings
- Testing the checkout button from the drawer and cart page
- Confirming the checkout URL is correct
- Temporarily disabling checkout redirect rules
- Excluding the checkout page from cache
- Testing as both a guest and logged-in user
Quantity Changes Not Updating the Subtotal
Quantity controls may fail when AJAX quantity updates are blocked or the cart drawer does not refresh totals after quantity changes. When this happens, shoppers may change item quantity but still see the old subtotal.
Fix it by:
- Enabling AJAX quantity updates if your plugin supports it
- Testing increase and decrease buttons inside the drawer
- Checking whether the subtotal updates without a page reload
- Excluding cart drawer scripts from delay or minification settings
- Testing in a private browser window
- Comparing behavior with the default WooCommerce cart page
Remove Item Button Not Working
Remove item issues often appear when the cart drawer script conflicts with another mini cart, side cart, or theme AJAX function. Sometimes the product only disappears after refreshing the page.
Fix it by:
- Testing product removal with caching turned off
- Keeping only one mini cart or drawer plugin active
- Checking whether subtotal and item count update after removal
- Temporarily disabling JavaScript optimization
- Testing with a default WooCommerce theme
- Re-enabling plugins one by one to find the conflict
Drawer Conflicts With Sticky Header
Sticky headers can overlap the cart drawer when the header has a higher z-index than the drawer or overlay. This may hide the close button, block cart actions, or make the drawer appear behind the header.
Fix it by:
- Increasing the drawer or overlay z-index
- Checking that the close button stays visible
- Testing the drawer while scrolling
- Avoiding duplicate cart icons in normal and sticky headers
- Checking mobile sticky header behavior separately
- Using one cart trigger for desktop and mobile where possible
Best Practices for Using a Menu Cart Drawer
Using a menu cart drawer correctly matters just as much as adding it to your store. A well-configured drawer improves flow, while a poorly set one can distract shoppers. Following these best practices helps you get the real advantages of a menu cart with drawer in WooCommerce without hurting usability or conversions.
- Avoid Auto-Opening the Drawer on Every Add to Cart: Auto-opening can help for small catalogs, but for large stores, it may feel annoying. Test both options and choose the one that feels natural for your shoppers.
- Keep the Drawer Layout Clean and Focused: Show only essential details like product name, quantity, price, and actions. Too many buttons or messages can overwhelm users and slow decisions.
- Optimize the Drawer for Mobile Screens: Make sure buttons are easy to tap and text stays readable. A drawer that works well on a desktop but fails on mobile can increase drop-offs.
- Limit Checkout Actions to One Clear Primary Button: Too many checkout choices can confuse buyers. A single clear action helps users move forward with confidence.
- Test With Caching and Real Devices Before Going Live: Always test cart updates, opening behavior, and checkout access with cache enabled. This avoids broken cart counts and unexpected drawer issues.
A simple, well-tested cart drawer improves shopping flow and keeps buyers focused until checkout.
Frequently Asked Questions
After setting up a menu cart drawer, many store owners still have a few practical questions in mind. These FAQs focus on real concerns users often think about once the setup is done and they start testing the shopping experience.
Can A Menu Cart Drawer Affect Checkout Conversions?
Yes, it often helps conversions by keeping shoppers focused and reducing extra steps. When users can review items quickly, they feel more confident about moving forward. A smoother cart experience usually leads to fewer abandoned purchases.
Is A Menu Cart Drawer Suitable For Small Stores?
Yes, even small stores benefit from a cart drawer because it saves time for shoppers. It removes the need to visit a separate cart page. This makes the buying process feel simpler and more direct.
Can I Customize The Look Of A Cart Drawer Without Coding?
In most cases, yes. Many plugins and block-based setups allow styling through settings or editors. You can adjust colors, spacing, and icons without touching code.
Does A Cart Drawer Work With All Payment Gateways?
A cart drawer itself does not affect payment gateways. Payments are processed on the checkout page as usual. As long as checkout loads correctly, gateways work normally.
Should I Show The Cart Drawer On Every Page?
Showing it on most pages is usually helpful, but it depends on your layout. Shoppers like easy access while browsing products. Just make sure it does not block important content.
Concluding Words
Adding a cart drawer can make shopping feel faster and more natural for your visitors. When set up the right way, it reduces page jumps, keeps users focused, and makes cart actions easier, especially on mobile screens.
This guide showed clear options for themes, plugins, and custom setups so you can decide what fits your store best. If you follow the steps carefully, testing along the way, you will understand how to add a menu cart with drawer in WooCommerce without breaking the flow or performance.